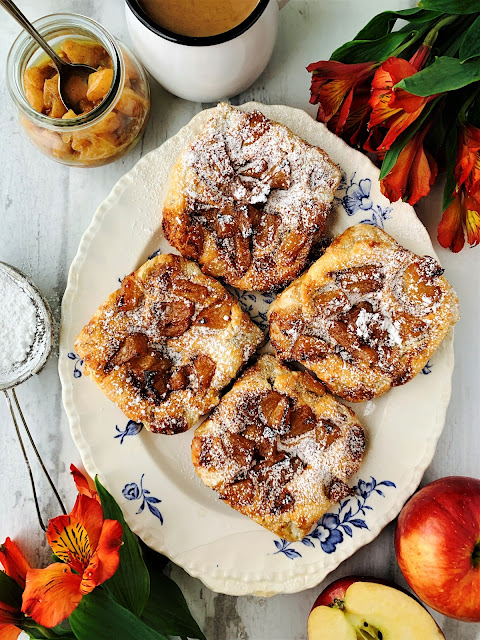
Flash forward almost 30 years (gulp), and pastries are still my jam, however I’m grateful that I now have the skill set and inclination to make my own at home. Sure, I could make a rough puff, but with frozen puff pastry readily available, this is a shortcut that yields pretty great results. First things first, is the utterly delicious caramelized apple filling.
You want to use an apple that is lovely and sweet, and that will hold its shape while it’s being caramelized in the skillet. For me, I reached for my favourite Cosmic Crisp Washington State apples. They’re crispier and sweeter than other varieties and naturally slow to brown. The Cosmic Crisp was classically bred in Washington State University and is non-GMO. A cross between ‘Honeycrisp’ and ‘Enterprise’, the Cosmic Crisp apple is sweet, large, and juicy, with a firm, crisp texture. Because of this impeccable taste and texture, Cosmic Crisps are perfect for snacking, cooking and baking. For caramelized apples, you want an apple that will hold its shape, and the Cosmic Crisp is absolutely perfect for this recipe. Cubes of this delicious apple are tossed in a skillet with butter (use salted) and sugar. They will get all lovely and golden with gorgeous caramelized bits after 10 minutes. A little cream makes a luxurious sauce, along with the maple syrup, cinnamon and lemon zest. This will reduce down quickly, leaving you with apples so good you’ll have to stop yourself from eating them so you can save some for the danishes! Making a double batch of the caramelized Cosmic Crisps is definitely NOT a bad idea.
The maple cream cheese is the next step and it too is a breeze. Just be sure to have it softened at room temperature then blend it with some maple syrup and vanilla. Assembling the pastry squares is also quite simple, and before you know it you’re pulling these gorgeous Danishes out of the oven. They look fancy - I like you got them at a posh bakery - and taste just as good. The caramelized apples just sink into the cream cheese and marry so nicely with the buttery pastry. It’s all just so delicious. A simple dusting of powdered sugar is all they need if you’re serving them to guests, or dropping them off on someone’s doorstep for a little surprise treat.
Cosmic Crisp apples are available across Canada at most major retailers, and remember that once you get them home, store them in the refrigerator’s crisper for optimal freshness, texture, and flavour.
Caramelized Cosmic Crisp Apple and Maple Cream Cheese Danishes
Leftover caramelized apples are quite good when swirled into yogurt, spread on pancakes or spooned on hot porridge in the morning.
Caramelized Cosmic Crisp Apples:
3 Tbsp salted butter
2 Tbsp granulated sugar
2 Cosmic Crisp Apples, peeled, cored and cut into ½-inch pieces
1/4 cup whipping cream
2 tsp pure maple syrup
1/4 tsp ground cinnamon
1/4 tsp lemon zest
Filling:
1/2 package (8 oz/250 g) full-fat cream cheese, at room temperature
1 1/2 Tbsp pure maple syrup
1/2 tsp vanilla bean paste or pure vanilla extract
Danish:
1/2 package (16 oz/450 g) all-butter puff pastry (I used President’s Choice)
1 large egg
2 tsp water
3 Tbsp coarse or Turbinado sugar, for sprinkling
1. To make the Caramelized Cosmic Crisp Apples: Melt the butter in a large skillet over medium heat. Sprinkle the sugar over the butter. Stir until the sugar begins to dissolve and melt, about 1 minute. Add the apples and sauté until they’re golden brown and juices form, about 10 minutes. Stir in the cream, maple syrup, cinnamon, and lemon zest. Simmer the apples until slightly thickened, another 2 minutes. Let the apples come to room temperature before proceeding with this recipe. This step can be prepared a day ahead, just rewarm over low heat.
2. In the bowl of a small food processor or using hand beaters, beat the cream cheese, maple syrup, and vanilla until creamy and smooth. Stop and scrape down the bowl a couple of times.
3. Preheat the oven to 400F. Position the rack in the centre of the oven
4. To assemble the Danishes: Line a baking sheet with parchment paper. Unfold the pastry sheet on a lightly floured surface. Cut the pastry into 4 quarters. Working with one square at a time, fold 1 1/2 inches of all four corners into the centre of the pastry, pressing the corner tips that are now in the centre down firmly. Don’t press down the outer edges of the pastry as we want this part to rise. Transfer these pastries to the prepared baking sheets and spacing them out evenly. Spoon 2 heaping tablespoons of the cream cheese mixture into the centre of each pastry, creating a deep divot in the centre so the apple filling won’t run out. I like to use the back of a soup spoon for this part. Dollop 1-2 heaping tablespoons of apple filling into the divot.
5. Make egg wash by whisking together the egg and water. Brush this over the edges of each Danish. Sprinkle the edges with the turbinado sugar.
6. Bake for 25-30 minutes until puffed and deeply golden brown, rotating the pan at the halfway point. Let cool on the baking sheet for 20 minutes before serving. Best eaten the day they’re made (dusted with a little bit of icing sugar), but if any leftovers remain, cover tightly and refrigerate. Reheat the Danishes in a 250F oven for about 8 minutes. Makes 4 servings.
Note: This recipe can be easily doubled to feed a larger crowd.


No comments:
Post a Comment
Thank you so much for taking the time to leave a comment!